
Layer farmers often encounter this situation: two farms receive chicks at the same time from the same hatchery, transported in the same truck, yet the chicks’ survival rates differ considerably. What causes this difference?
How can you raise 4 Grade A chicks successfully? The chick placement process is particularly important. This article covers preparations before placement and flock management during the first 3 days after placement to help poultry farmers raise healthy chickens.
I. Preparations Before Chick Placement
1. Thorough Cleaning Before Chick Placement
Follow the “five no’s” management principle: no feathers, no manure, no feed, no foreign objects, and no dirt. Clean according to a zone-based management plan, working from the inside out (poultry house, living area). Inspect the areas carefully after cleaning. Where possible, use microbial sampling to verify cleaning quality.
2. Quick Preparations Before Chick Placement
It is mainly divided into two parts: internal preparation and external preparation.
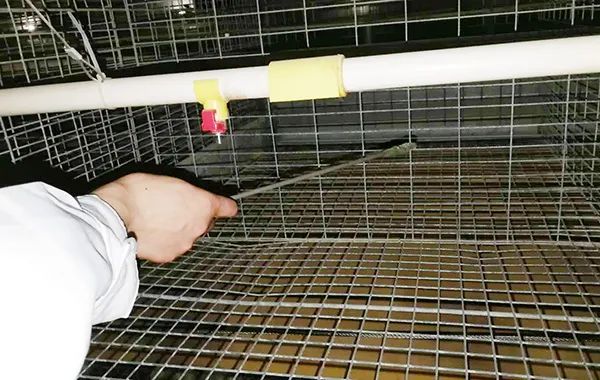
Internal preparation mainly concerns the inside of the chicken house. It includes flame-disinfecting the chicken-house cages and racks, inspecting and repairing equipment, disinfecting the inside and outside of the drinking-water pipes, adjusting the height of the chicken barriers, and preparing the floor netting and drinking-water containers, among other things. Once the inside of the chicken house has been prepared, it should be disinfected by fumigation. Keep the chicken house sealed for at least 24 hours during fumigation. Begin ventilation three days before the chicks arrive. Ventilation can be carried out while raising the temperature, allowing the disinfectant vapor to dissipate more thoroughly and helping prevent damage to the chickens’ respiratory mucosa.
External preparation mainly concerns the production area and follows the “four no’s” management principle: no feathers, no chicken manure, no weeds, and no dirt. While maintaining quality, external-area preparation should also be completed quickly and efficiently.
3, have all personnel and supplies ready before receiving the chicks
Arrange the personnel needed before the chicks arrive according to their arrival time. Since the workload is heavy on the day the chicks arrive, temporary workers can be hired to ensure the chicks are received smoothly. Items to prepare before the chicks arrive include feed, vaccines, and drinking water at room temperature. Also, test the backup power supply and heating equipment before the chicks arrive.
Managers responsible for receiving the chicks should plan which houses to use based on the number of chicks and calculate the number of chicks per frame or cage. Determine the number of feed trays and drinkers according to the number of chicks.
二、接鸡管理第1天
1, suitable conditions for receiving the chicks
The environment that chicks are exposed to mainly involves lighting, temperature, and humidity. For lighting, consider both the duration and intensity of light. For details, refer to the rearing plans in the Smart Layer Chicken Raising section. Temperature and humidity should be managed in accordance with standard procedures. One detail to pay attention to is preheating before the chicks arrive. Choose how many days in advance to preheat according to the season. Generally, in summer, raise the temperature one day before the chicks arrive; in winter, preheat 2~3 days in advance. The sole aim is to reach our ideal brooding temperature. Use heating equipment to preheat the poultry house to around 35℃, then gradually lower it to the chick-arrival temperature of 32℃. This improves the flock’s comfort after placement in the cages and helps the birds eat, drink, and move around.
2, Efficient Chick-Receiving Process
Communicate about the chick-receiving process in advance, including with the transport vehicle driver, to avoid delays affecting chick quality. Keep track of the transport vehicle’s route and arrival time, disinfect the chick-receiving vehicles in advance, and assign tasks to the chick-receiving staff to ensure an efficient process.
3, Rapid Placement in Cages
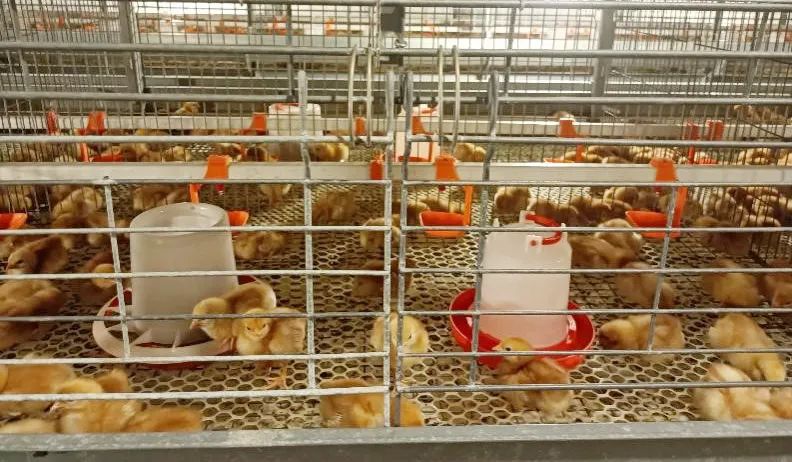
Move the chicks into the poultry house as soon as possible after they arrive, since exposure to cold stress outdoors can have a significant impact on them. After unloading, stack no more than four layers of chick boxes inside the poultry house. Do not place the boxes beside the stove, and keep them away from hot-air outlets to prevent excessive heat or oxygen deprivation in some boxes. When placing the chicks, put the weaker ones in warmer locations; water can be offered with manual assistance.
The principle for placement in cages is to get the chicks from the transport vehicle into the cages as quickly as possible so they can have their first drink and feed.
III. Management on Days 2—3 After Chick Arrival
1, Keep the Rearing Environment Stable
Ensure a stable environment in the chicken house during the early stage. The temperature should be appropriate, uniform, and stable. Based on the temperature set on the first day, gradually lower the temperature thereafter. Pay particular attention to ventilation. During the first 2~3 days of brooding, depending on the outdoor temperature, you may consider not mechanically ventilating the chicken house and simply opening the small ventilation windows to allow natural ventilation. If ventilation is needed, ensure the proper coordination of temperature, fans, and air inlets.
2, Pay close attention to the flock
Monitor the flock’s initial drinking and feeding, and ensure a high early feeding rate. The feeding rate should reach 100% within 24 hours. Chicks that start drinking and feeding late should be helped to drink water by hand. Carry out the flock’s early training. Brooding management is irreversible, so personnel responsible for feeding and management should focus on the early brooding stage, including whether the chicken-house environment is comfortable and whether the flock shows any abnormal behavior.
3, Report on the flock’s health
To ensure good early-stage flock management, personnel responsible for feeding and management should check the flock’s environmental parameters every day, comparing the actual temperature and humidity in the chicken house, the number of fans in operation, ventilation volume, and actual water consumption with the rearing plan. Each day, managers should monitor the overall flock’s general condition, the number of deaths and culls, and body weight gain against the standard. If the flock shows abnormalities, its visible and necropsy symptoms can be assessed initially using the intelligent diagnosis feature of 智慧兽医, helping avoid major losses.
Raising chickens well is the ultimate goal of every poultry farmer. A simple and efficient chick-receiving process, followed by proper management, can help ensure the flock’s good health and strong production performance in the early stage, laying a solid foundation for later rearing. We hope poultry farmers will pay attention to chick-receiving management, preparation before the chicks arrive, and management during the first three days. By carefully managing every detail, they can achieve the ultimate goal of receiving and raising healthy chicks.