
In poultry farming during the hot summer months, ensuring that poultry house cooling equipment operates properly is fundamental to protecting the health and safety of the flock.
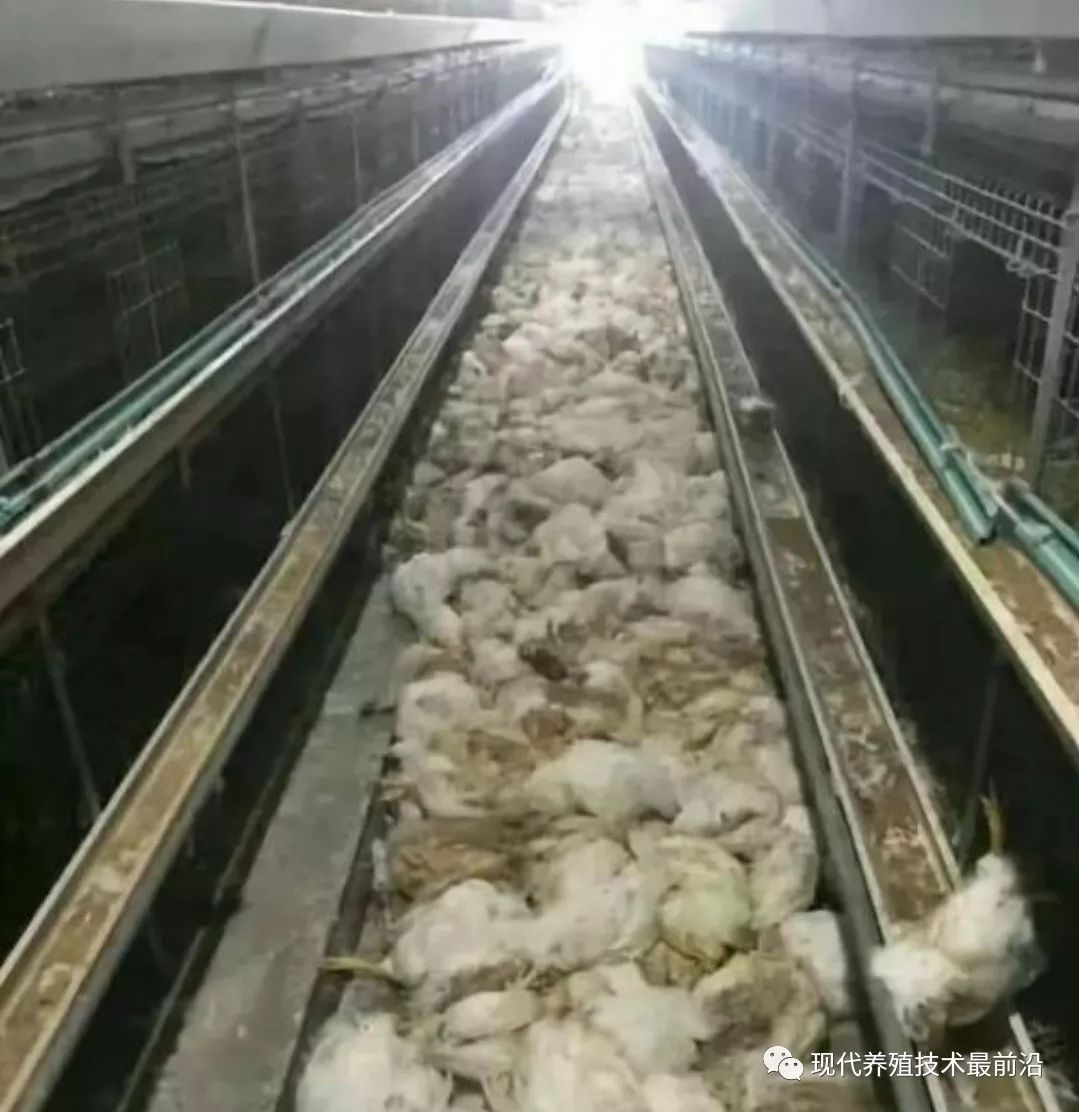
Especially during the middle and later stages of rearing, the flock needs the fans to run normally for 24 hours a day to meet its oxygen supply and cooling needs. If the power supply or ventilation equipment fails, and the fans stop for more than 30 minutes, the flock could suffer a devastating disaster.
Losses caused by power supply equipment failures at a poultry farm are far greater than those caused by disease!
During production management in the hot summer months, we as managers must strengthen the inspection and maintenance of important equipment such as fans, cooling pads, water pumps, environmental control systems, wiring, distribution cabinets, and generator sets to ensure the normal operation of cooling equipment.
A modern, large-scale poultry farm cannot operate without a stable, appropriately matched power supply. Most incidents at poultry farms are caused by electrical problems, with serious consequences and huge losses. Electrical requirements must be professionally calculated when designing poultry houses, and some spare power capacity and backup power sources must be provided for emergencies. In my view, the design of a poultry farm’s power supply system must take every detail into account. From the outset, all foreseeable issues must be considered comprehensively. There should be two transformers, with spare capacity based on total electricity consumption to meet future needs. The wiring for each section must be carefully calculated, and the main line must have a backup. Generators should also be duplicated and high-powered. All switches must be safe products. Remember: no electrical issue is too small to take seriously. Fan wiring in poultry houses must use a cross-connected arrangement between houses. What does this mean? It means that some of the fans in poultry house 2 must receive power from the main power supply of poultry house 1 or poultry house 3, ensuring the minimum requirements of the poultry house are met.
An independent manual switch must be installed at the fan end for fan control. This prevents a failure of the environmental controller from making it impossible to control the fans automatically. In addition, during the middle and later stages of rearing, a certain number of basic ventilation fans must be switched on manually to ensure proper ventilation in the poultry house. Do not rely entirely on the environmental controller’s temperature control to switch on the fans. If the environmental controller fails and the fans stop, the flock will face a serious risk (especially when electricity consumption is high, voltage is unstable, during thunderstorms, or when equipment fails).
At the same time, the generator set must have a dedicated line supplying power directly to the chicken-house fan units, to prevent the fans from being unable to receive a normal and timely power supply if the main line fails (for example, if the main line is damaged during a thunderstorm with strong winds). In addition, provide rigorous training and warnings on electrical safety, prepare an emergency plan for power outages in the chicken houses, and increase the time and frequency devoted to circuit inspections, paying particular attention to loose wire connections. Install fault controllers and alarms in sections at all key locations, increase inspection rounds, and identify and repair problems immediately. Have at least three solutions for each problem, and use regular drills to teach everyone the emergency measures to take immediately. A designated person must inspect and repair the electrical system; unqualified personnel must not operate it without authorization. Also assign a designated person to manage the electrical facilities to prevent human error. The premises must be equipped with appropriate firefighting equipment. Drills for power outages and firefighting must be held regularly. Many problems can arise with the power system, whether ventilation equipment stops working, someone receives an electric shock, or a fire breaks out. None of these events can be resisted, and any one of these accidents will result in huge losses. Never treat this lightly; it could very well be catastrophic.
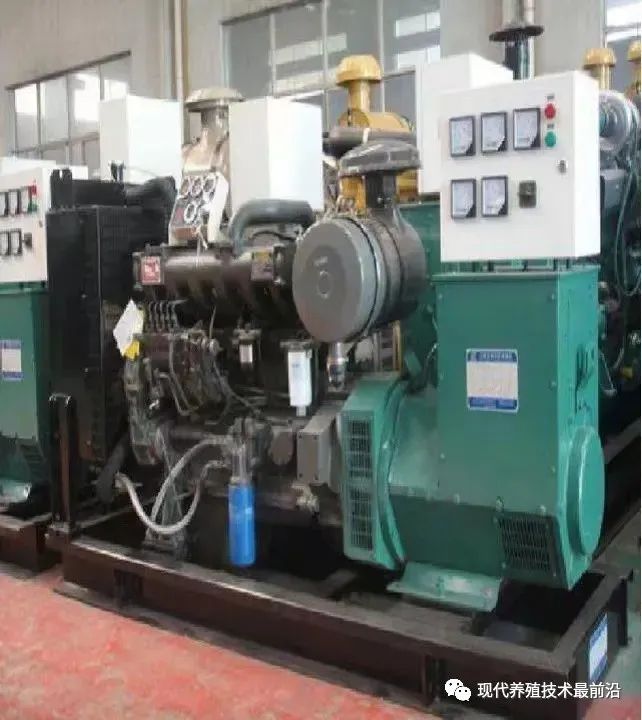
In production management, safe and proper startup of the generator set is the last line of defense for ensuring that equipment in the chicken houses operates normally. Therefore, a normal poultry farm should have at least 2 people who can start the generator set proficiently, ensuring a normal power supply to the chicken houses on the premises for 24 hours and safe equipment operation (to cover emergency shifts when staff are away or otherwise unavailable).
At the same time, carry out generator set inspections and maintenance as part of daily work. The specific procedures are as follows!
Generator set safe operating procedures and maintenance: Safe operating procedures:
I. Pre-operation checks
1 Check whether there are any obstructions around or on the surface of the unit.
2 Check whether the air intake and exhaust passages in the machine room are unobstructed.
3 Check whether the coolant level in the water tank is normal.
4, check whether the air filter is normal.
5, check whether the lubricating oil level is within the normal range.
6, check whether the fuel valve is open and the fuel supply is normal.
7, check whether the battery cables are connected correctly.
8, check whether the power-generation load equipment is ready. When the generator directly supplies a load, the unit’s air circuit breaker must be open before startup. (However, for units with automatic transfer, the air circuit breaker should be closed first.)
II. Operation
1, once the unit is running at full speed and the generator voltage and frequency are normal and stable, the operator may close the air circuit breaker.
2, while the unit is running, the operator should also regularly check whether it is operating normally, whether the control panel instrument readings are within the normal range, whether there are any pre-alarm indicators on the control panel, the fuel tank level, and other operating parameters, and record the unit’s operating parameters at set intervals.
3. Before normally shutting down the unit, first disconnect the load, then run the unit without load for a period of time (2-5 minutes) to allow it to cool down fully before shutting it down.
III. After operation
1. Check the unit for any “three leaks” (lubricating oil, fuel, or coolant).
2. Close the fuel valve.
3, close the equipment room's air intake and exhaust facilities.
4, switch off the generator set's output circuit breaker.
5, turn off the control panel's power key switch, remove the key, and keep it safe.
6, when the generator set is shut down for an extended period or is undergoing maintenance, the negative cable of the starting battery must be disconnected,
If necessary, drain the fuel, coolant, and other fluids as well.
Maintenance
I. Basic Requirements
1, regular maintenance of the unit is essential to achieve maximum operating safety and service life. Strictly following the maintenance regulations can ensure that the unit operates safely and efficiently.
2, maintenance of the unit must be carried out while it is shut down, and the negative cable of the unit's starting battery must be disconnected to ensure that the unit cannot start accidentally.
II. Engine
Pre-start Inspection
1, check the lubricating oil level.
2, check the coolant level.
3, check the air filter restriction indicator.
4, check the radiator and external ventilation.
5, check the engine drive belt assembly.
6, check the fuel supply.
For units in continuous operation, inspect every 6-8 hours. For standby units, inspect again after shutdown. For new units, the interval depends on operating conditions; if necessary, inspect after 100-300 hours:
7, check the valve clearance.
8, check the fuel injectors. Every 50 hours of operation:
9, drain the water from the fuel-water separator.
10, check the electrolyte level in the starting battery.
Every 50-600 operating hours:
11, replace the lubricating oil and lubricating oil filter.
12, replace the fuel filter, clean or replace the fuel coarse filter element and oil-water separator element, and inspect and clean the fuel lines.
Every 400 hours:
13, inspect and adjust the drive belt; replace it if necessary.
14, inspect and clean the radiator core.
15, drain sludge from the fuel tank.
Every 800 hours:
16, check the turbocharger for leaks.
17, check the intake piping for leaks.
Every 1200 hours of operation:
18, adjust the valve clearance.
Every 2000 hours of operation:
19, replace the air filter.
20, replace the coolant and coolant filter.
21, thoroughly clean the radiator core and water passages.
Every 2400 hours:
22, inspect the fuel injectors.
23, thoroughly inspect and clean the turbocharger.
24, comprehensively inspect the engine equipment.